

edgeMED Help Center > Electronic Health Records > EHR
Order labs.
Setting Up a Lab Integration
A time-saving feature of the EHR is the ability to send lab orders digitally. Get started by contact your edgeMED representative and we'll take it from there. If you're not sure of your edgeMED representative, send an email to help@edgemed.com.
In this article, we’ll cover how to:
Order Labs
Add/Remove Lab Order Favorites
View/Print the Requisition Document
View/Print a Specimen Label
View/Print the ABN Document
Let’s begin!
Order Labs
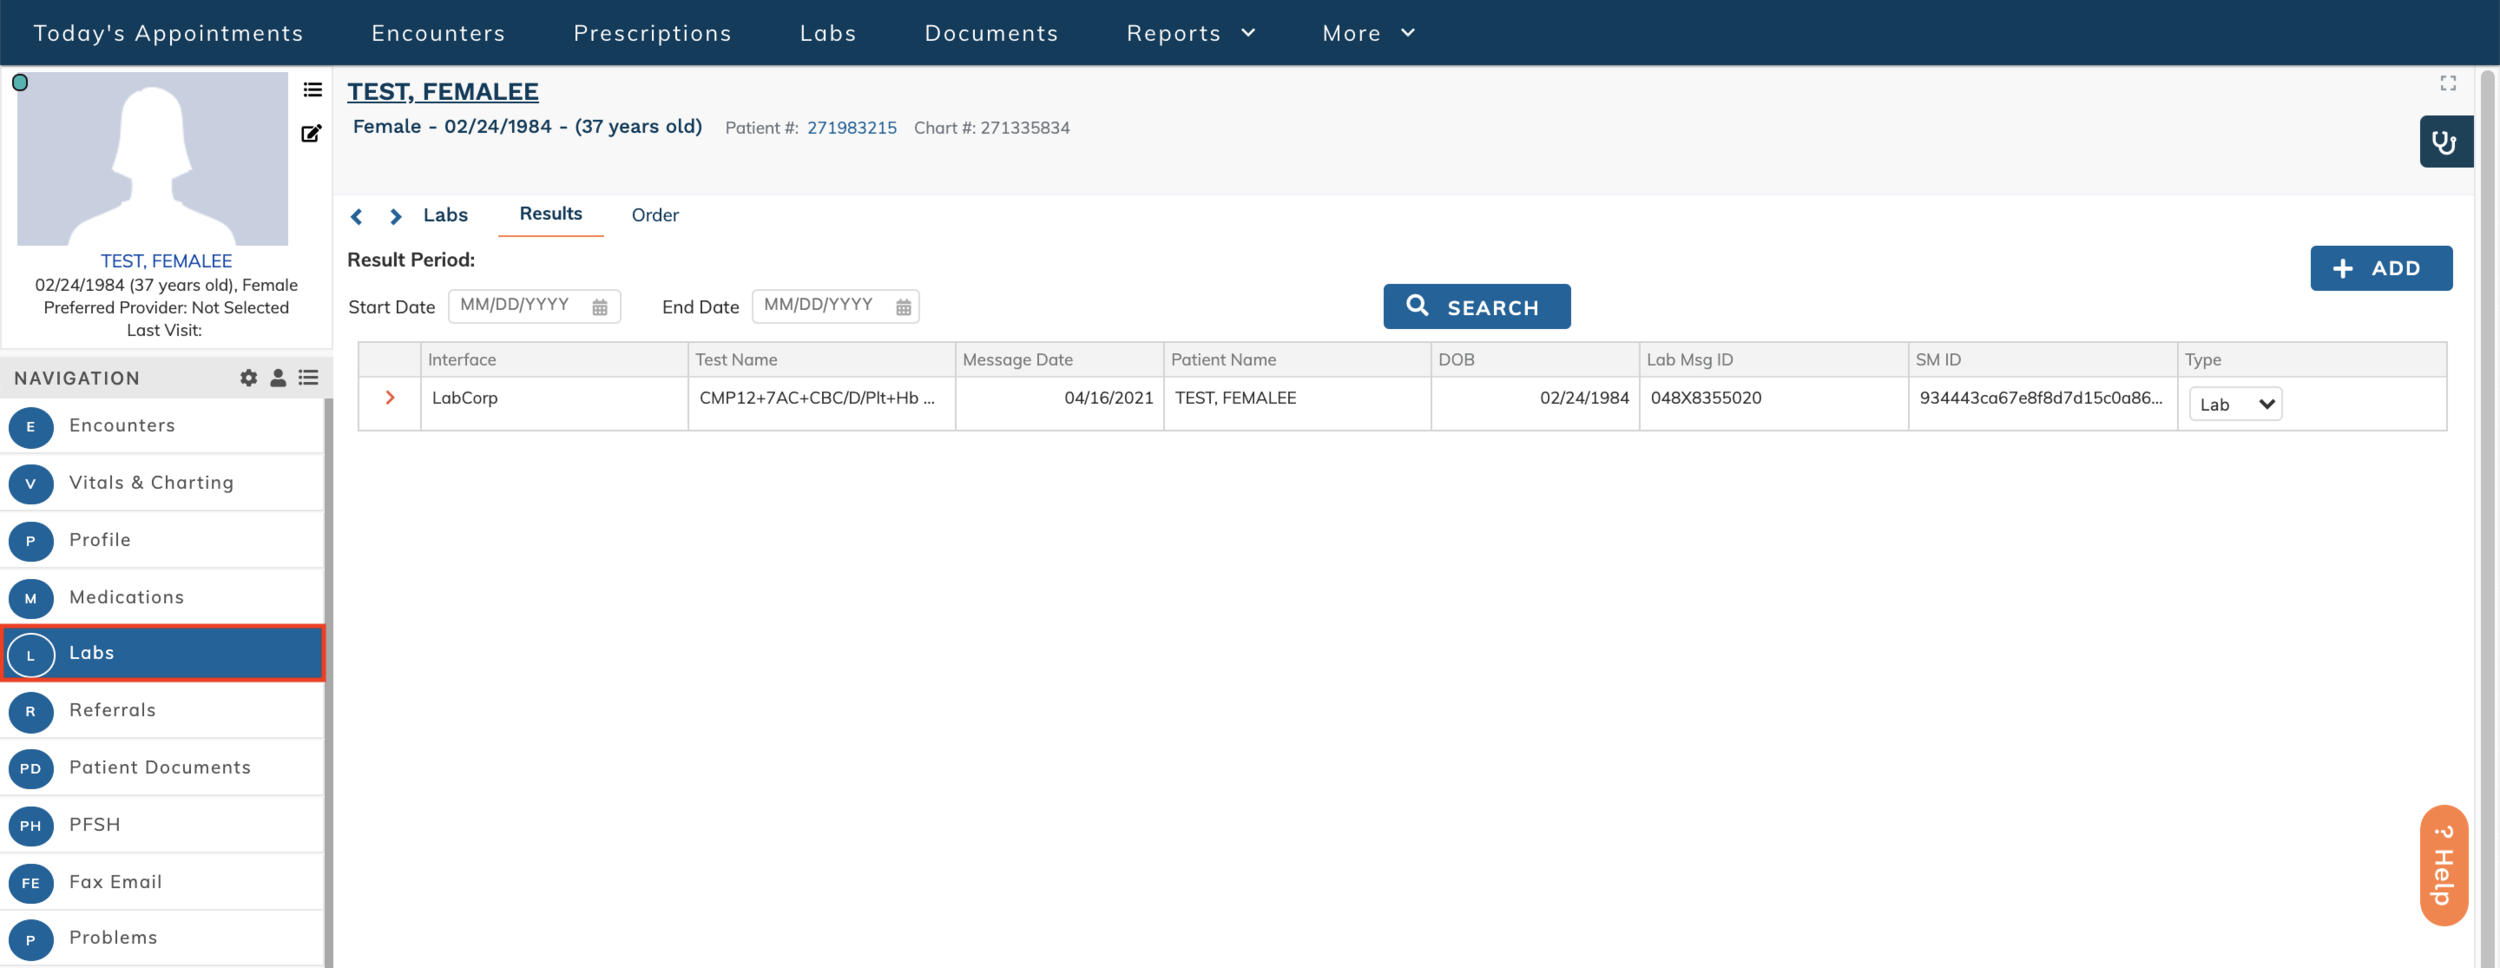
Once your labs are set up in the EHR, click Labs from the patient dashboard.
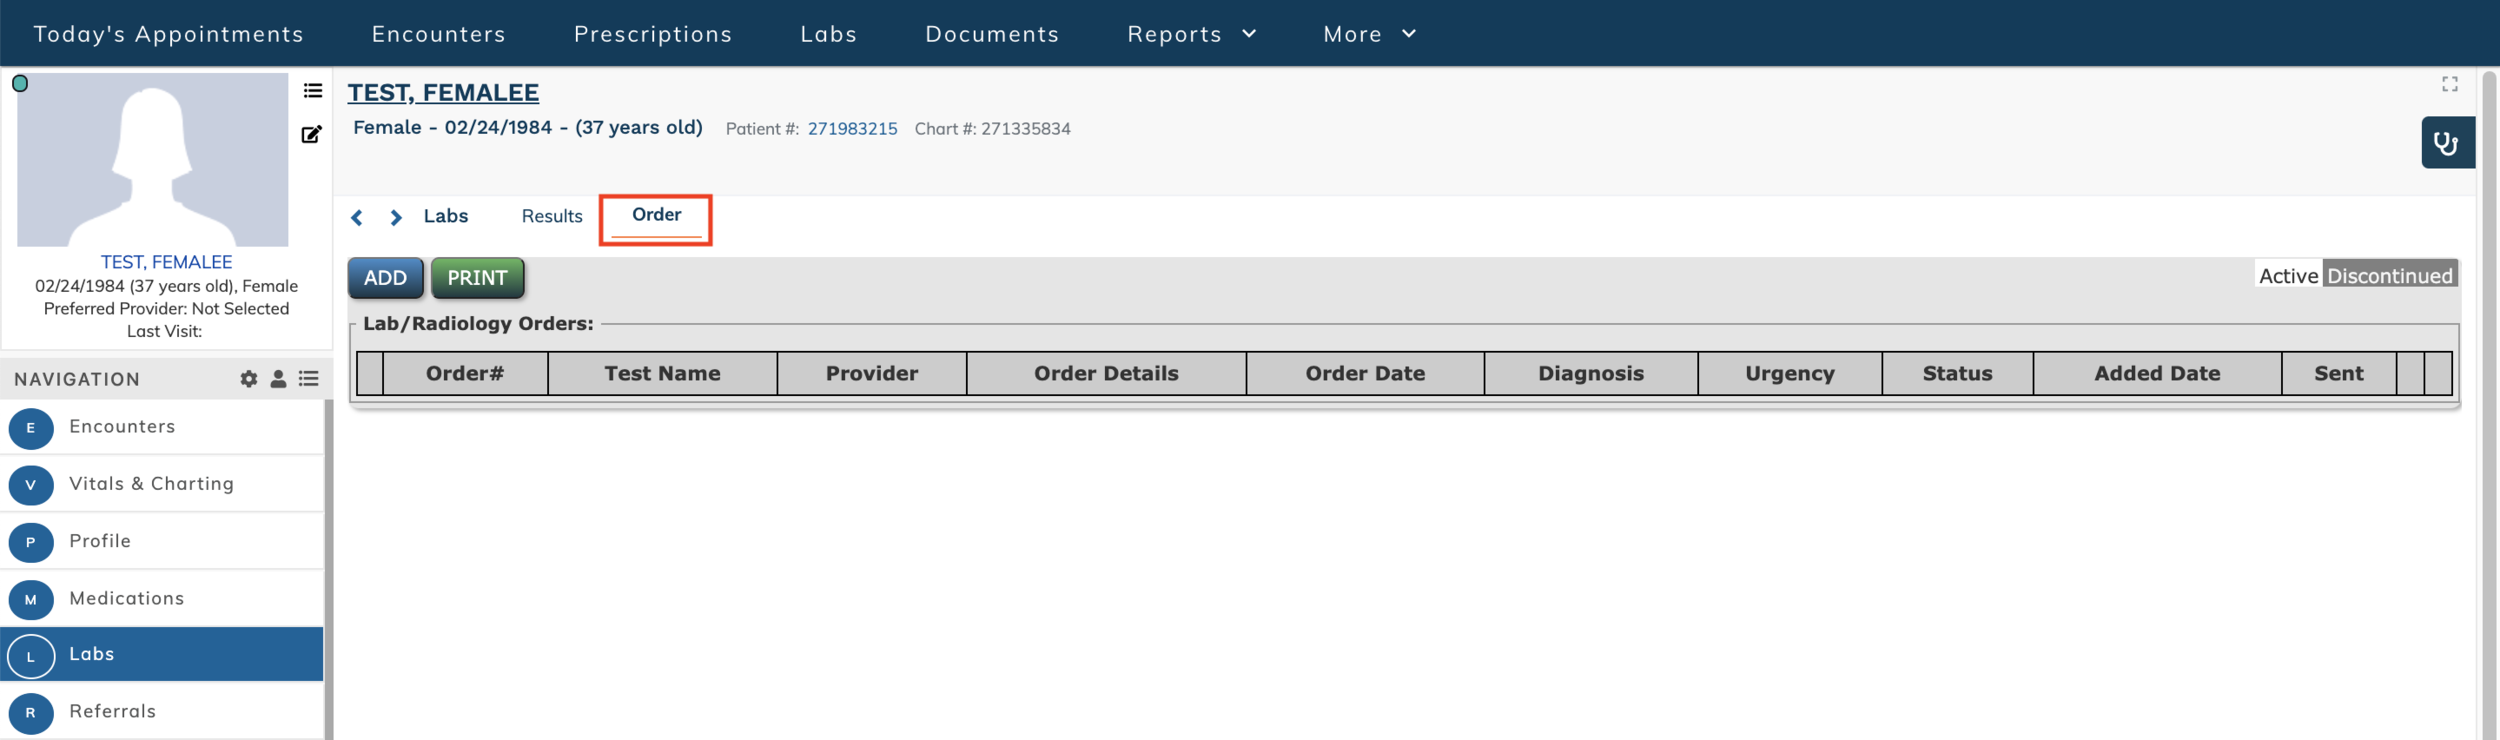
Click Order.
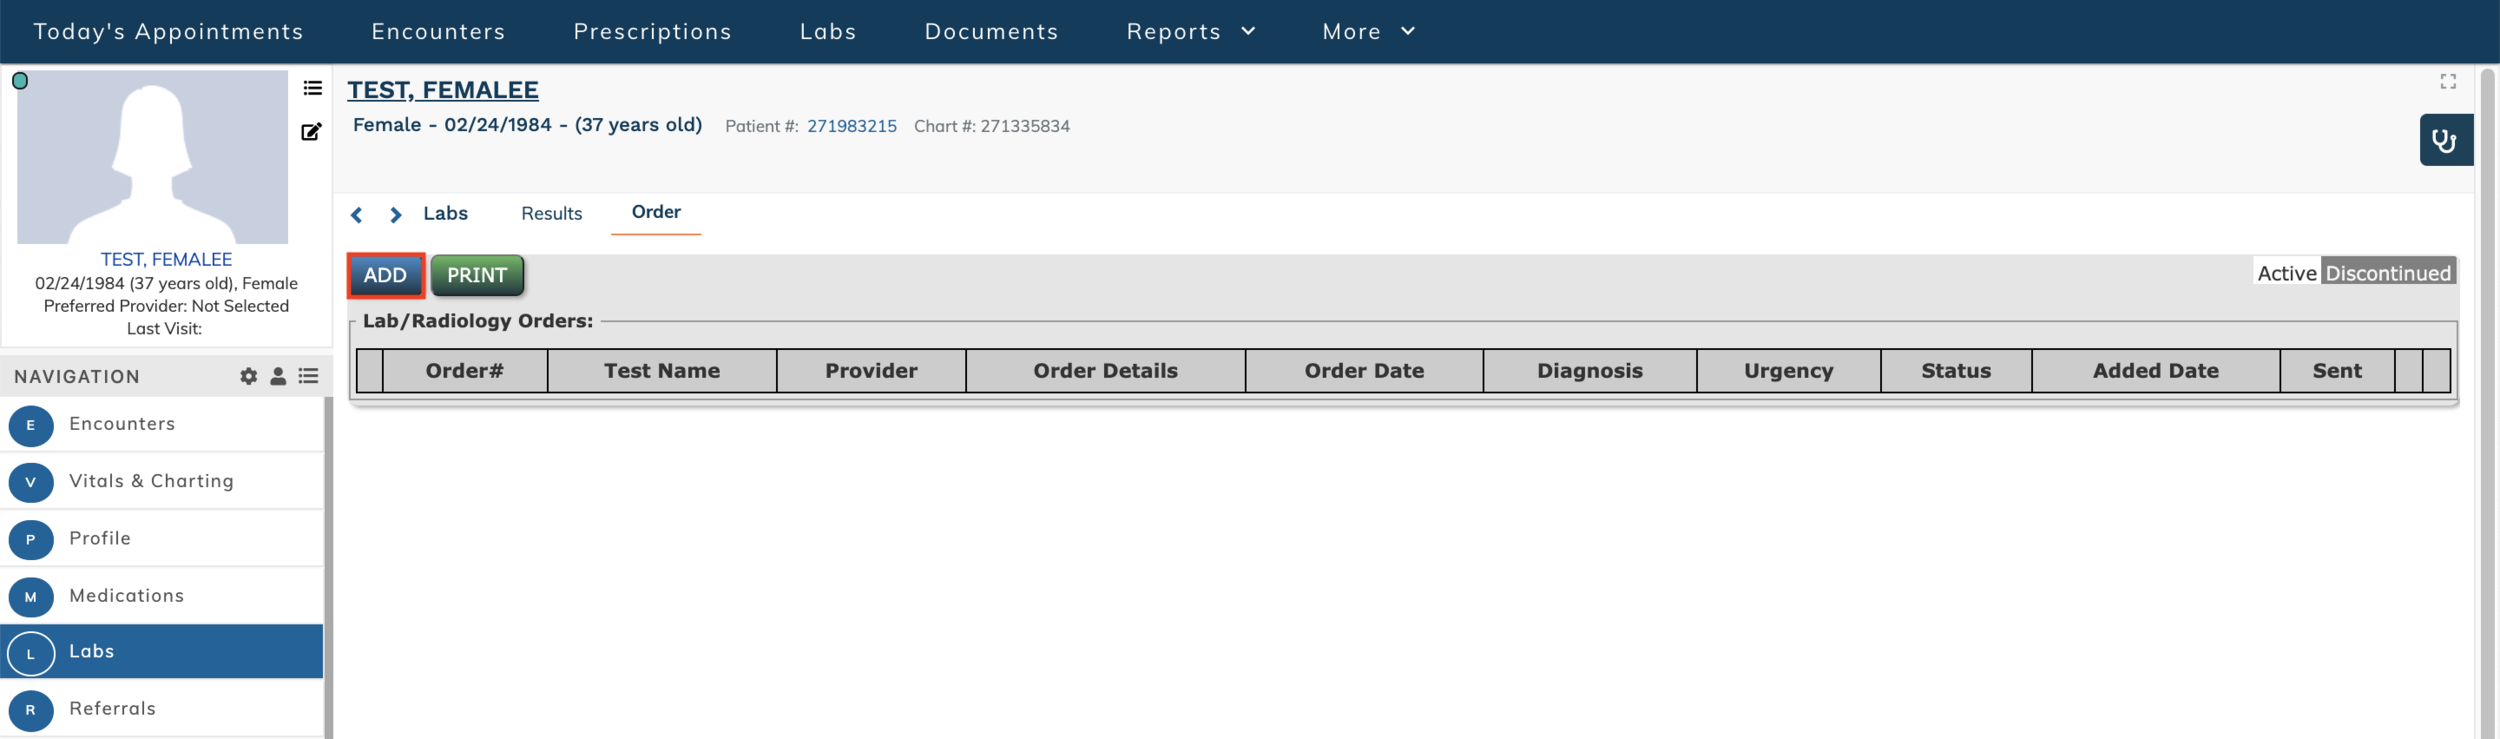
Click Add.

If you're connected to multiple labs, select the lab you want from the Facilities dropdown menu.
Next, select the correct case information from the Cases drop-down.
Next, Search for the test.
Many labs require a diagnosis to be attached to the order.
Next, select the green + icon to add another test to the lab order. Click the red - icon to remove a test from the lab order.
Click Next.
Answer the four questions that are displayed and click Next.
Click Send.
Add/Remove Lab Order Favorites

To add or remove an order, click on the star next to the test name. Adding an order will turn the star yellow, removing an order returns the star to grey.
View/Print the Requisition Document
Click Labs from the patient dashboard.
Click Order.

Click the blue “R.”
View/Print a Specimen Label
Click Labs from the patient dashboard.
Click Order.

Click the green “L.”
View/Print the ABN Document
Follow the same steps as above, but step #3 below is different:
Click Labs from the patient dashboard.
Click Order.
Click the red “A.”
Still need help? Contact us!