

edgeMED Help Center > Electronic Health Records > EHR
Complete, sign and release an encounter.
Add Checkout Instructions

Click Checkout icon.

Add patient and front desk checkout instructions and click Save. Once saved, checkout instructions will be shown in the Checkout section of the appointment in the Scheduler. Be sure to only include information that is intended for the front desk staff to view.
Sign an Encounter
This functionality can take place both from the Patient Dashboard and Encounter Edit. You may desire to have encounter templates require multiple signatures. See below for information on Multi-Signature Encounters.
Patient Dashboard

Navigate to the appropriate patient's Encounter list. Click the vertical three dots icon for a Draft or Review encounter.

Select Sign.

Click Sign to confirm that you want to sign the encounter. To hide this confirmation in the future, select the checkbox for "Don't show this message again."

Signed encounters are indicated in the Encounters section of the Patient Dashboard.
Encounter Edit

Open the appropriate Draft or Review encounter and click Sign icon. You'll see a confirmation message that the encounter was signed successfully. Click Go to Encounters to close the encounter and return to the patient's encounter history. To hide this confirmation in the future, select the checkbox for "Don't show this message again."
Signed encounters are indicated in the Encounters section of the Patient Dashboard.
Multi-Signature Encounters
Open the appropriate Draft or Review encounter and click Sign icon.

Choose the appropriate role in the pop-up and click Sign.

Roles that have already been signed will have a checkmark next to them.

Signatures on the encounter PDF will show the provider role in parenthesis.

Multi-signature encounters have an additional status - Review. Encounters marked as Review have been signed by at least one provider, but have not been fully signed yet. Review encounters are included in the Unsigned Encounters list on the provider dashboard.
Release an Encounter
If your practice is using the Billing product in addition to the EHR, encounters can be released from the EHR to billing to seamlessly communicate diagnosis and coding information to medical billing staff.
What information is released with an encounter?
The following information is added to the billing product as an unsigned encounter for the patient:
Rendering provider (if the encounter provider is linked to a rendering provider in the billing product)
Date of visit (as service date)
ICD-10 codes from the diagnosis plugin
CPT codes from the procedure plugin
Diagnosis codes liked to a procedure
Units for each procedure code
For your convenience, you can release an encounter from multiple areas within the application.
Today’s appointments

Click on the Encounter # in the Today's Appointments list. The encounter will automatically launch.

Click Release to send the encounter to the billing product.
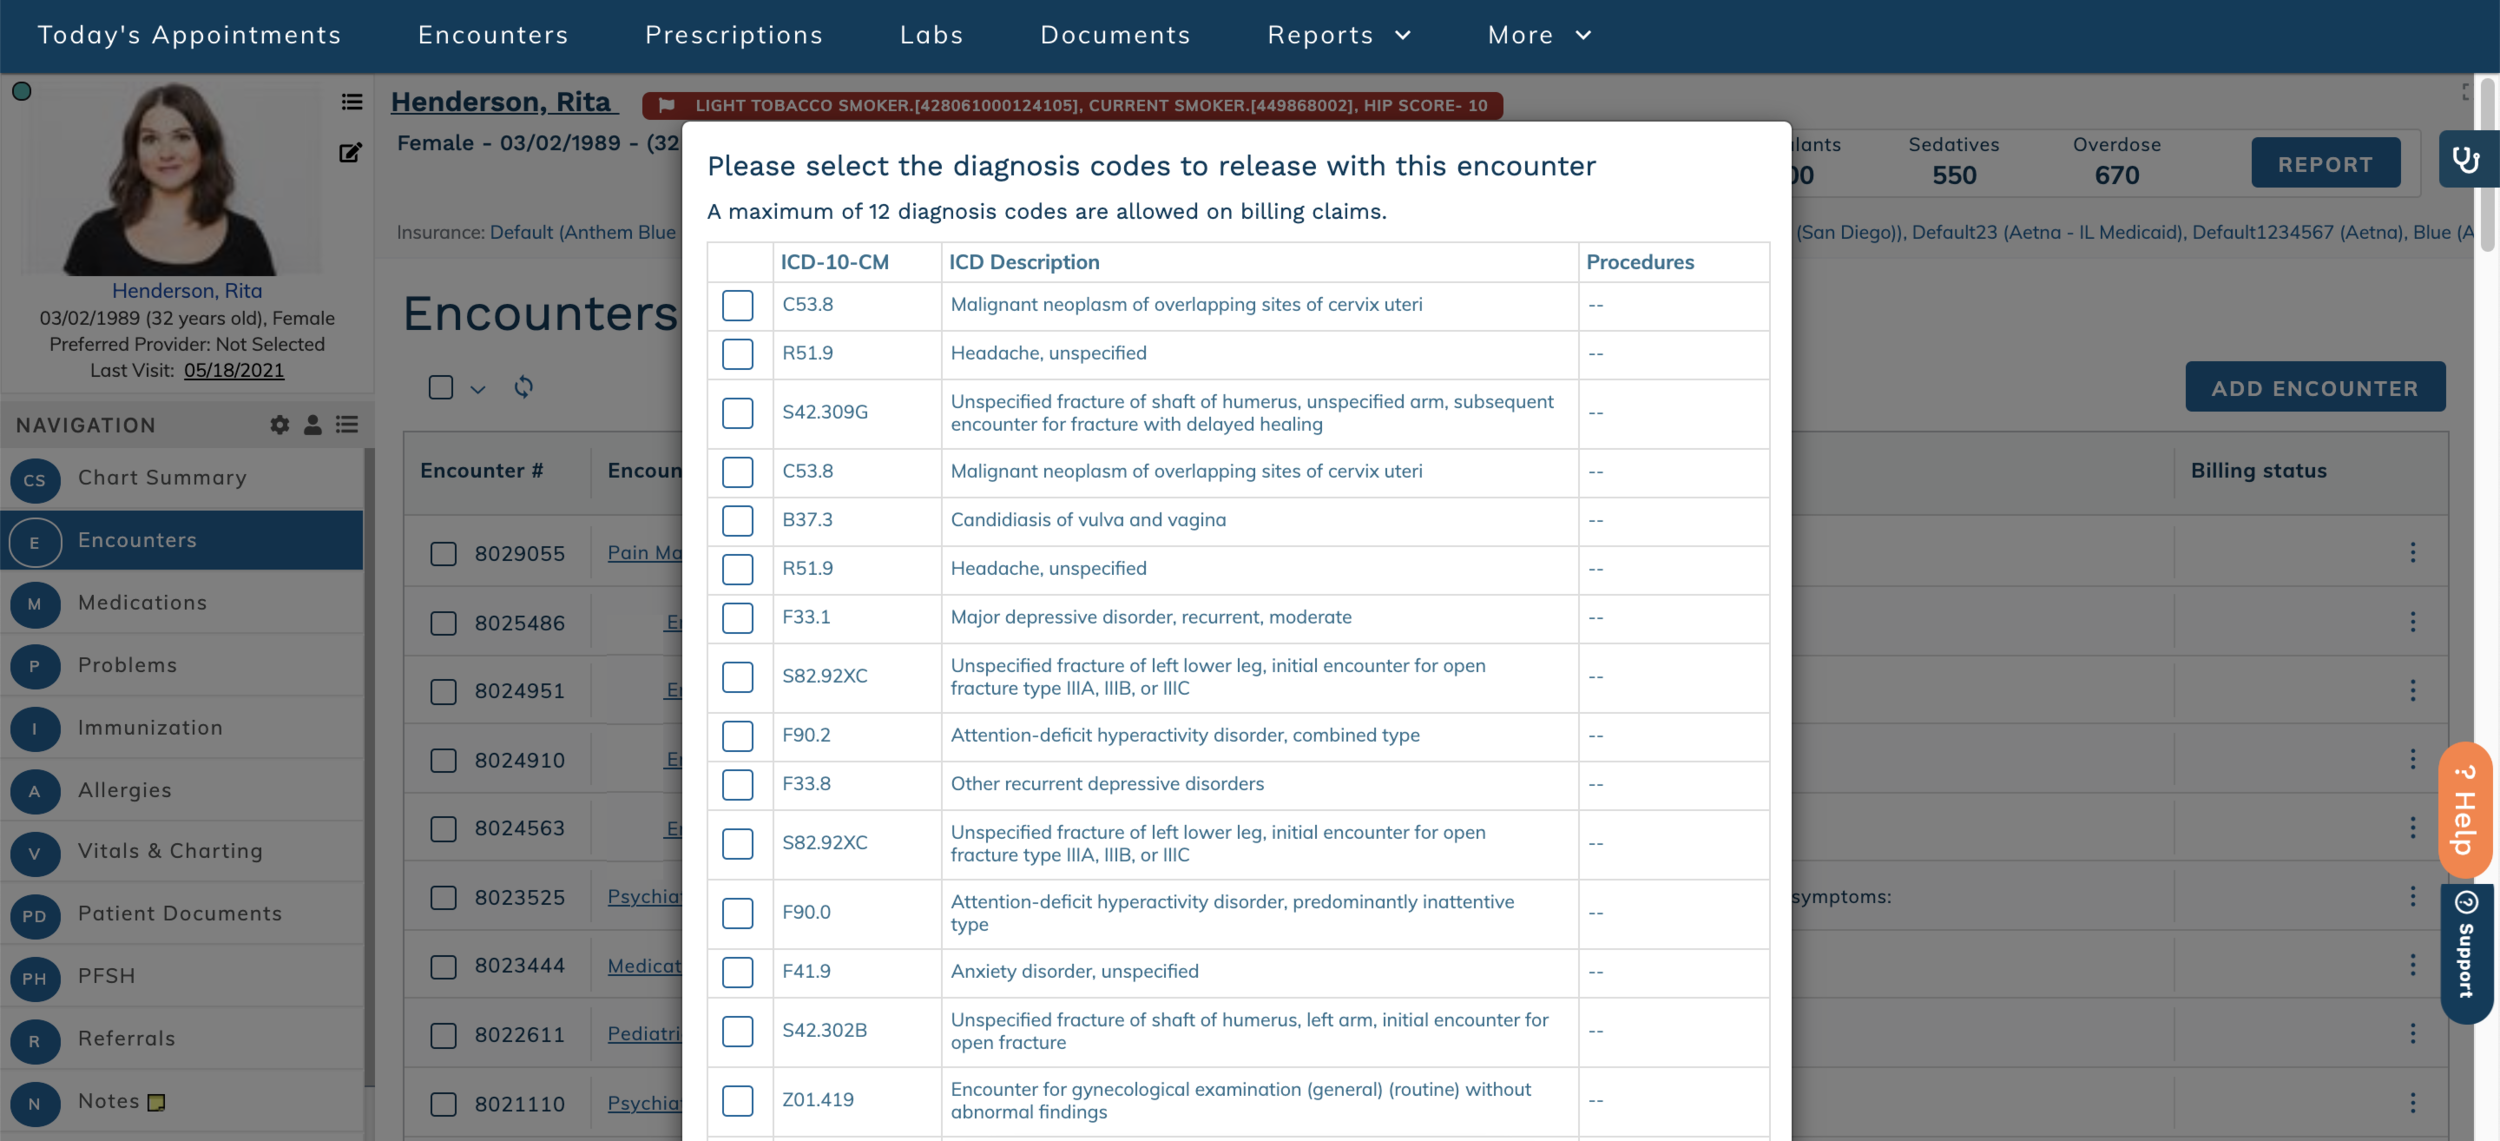
If you are releasing an encounter that has more than 12 diagnosis codes, you'll be prompted to choose which diagnosis codes should go to the Billing product. Insurance claims are limited to 12 diagnosis codes or fewer.
Diagnosis codes linked to a procedure are automatically selected for release. Click the checkbox next to additional diagnosis codes that should be released.
Click Release to send the encounter to the Billing product.
Main Dashboard

Select Release Encounter icon.

Click on Encounters or (E) on the left side menu.

Click Unreleased Encounters.

Click the green arrow icon to the right of an encounter to release it to the billing product.
If you are releasing an encounter that has more than 12 diagnosis codes, you'll be prompted to choose which diagnosis codes should go to the Billing product. Insurance claims are limited to 12 diagnosis codes or fewer.
Diagnosis codes linked to a procedure are automatically selected for release. Click the checkbox next to additional diagnosis codes that should be released.
Click Release to send the encounter to the Billing product.
Patient Dashboard
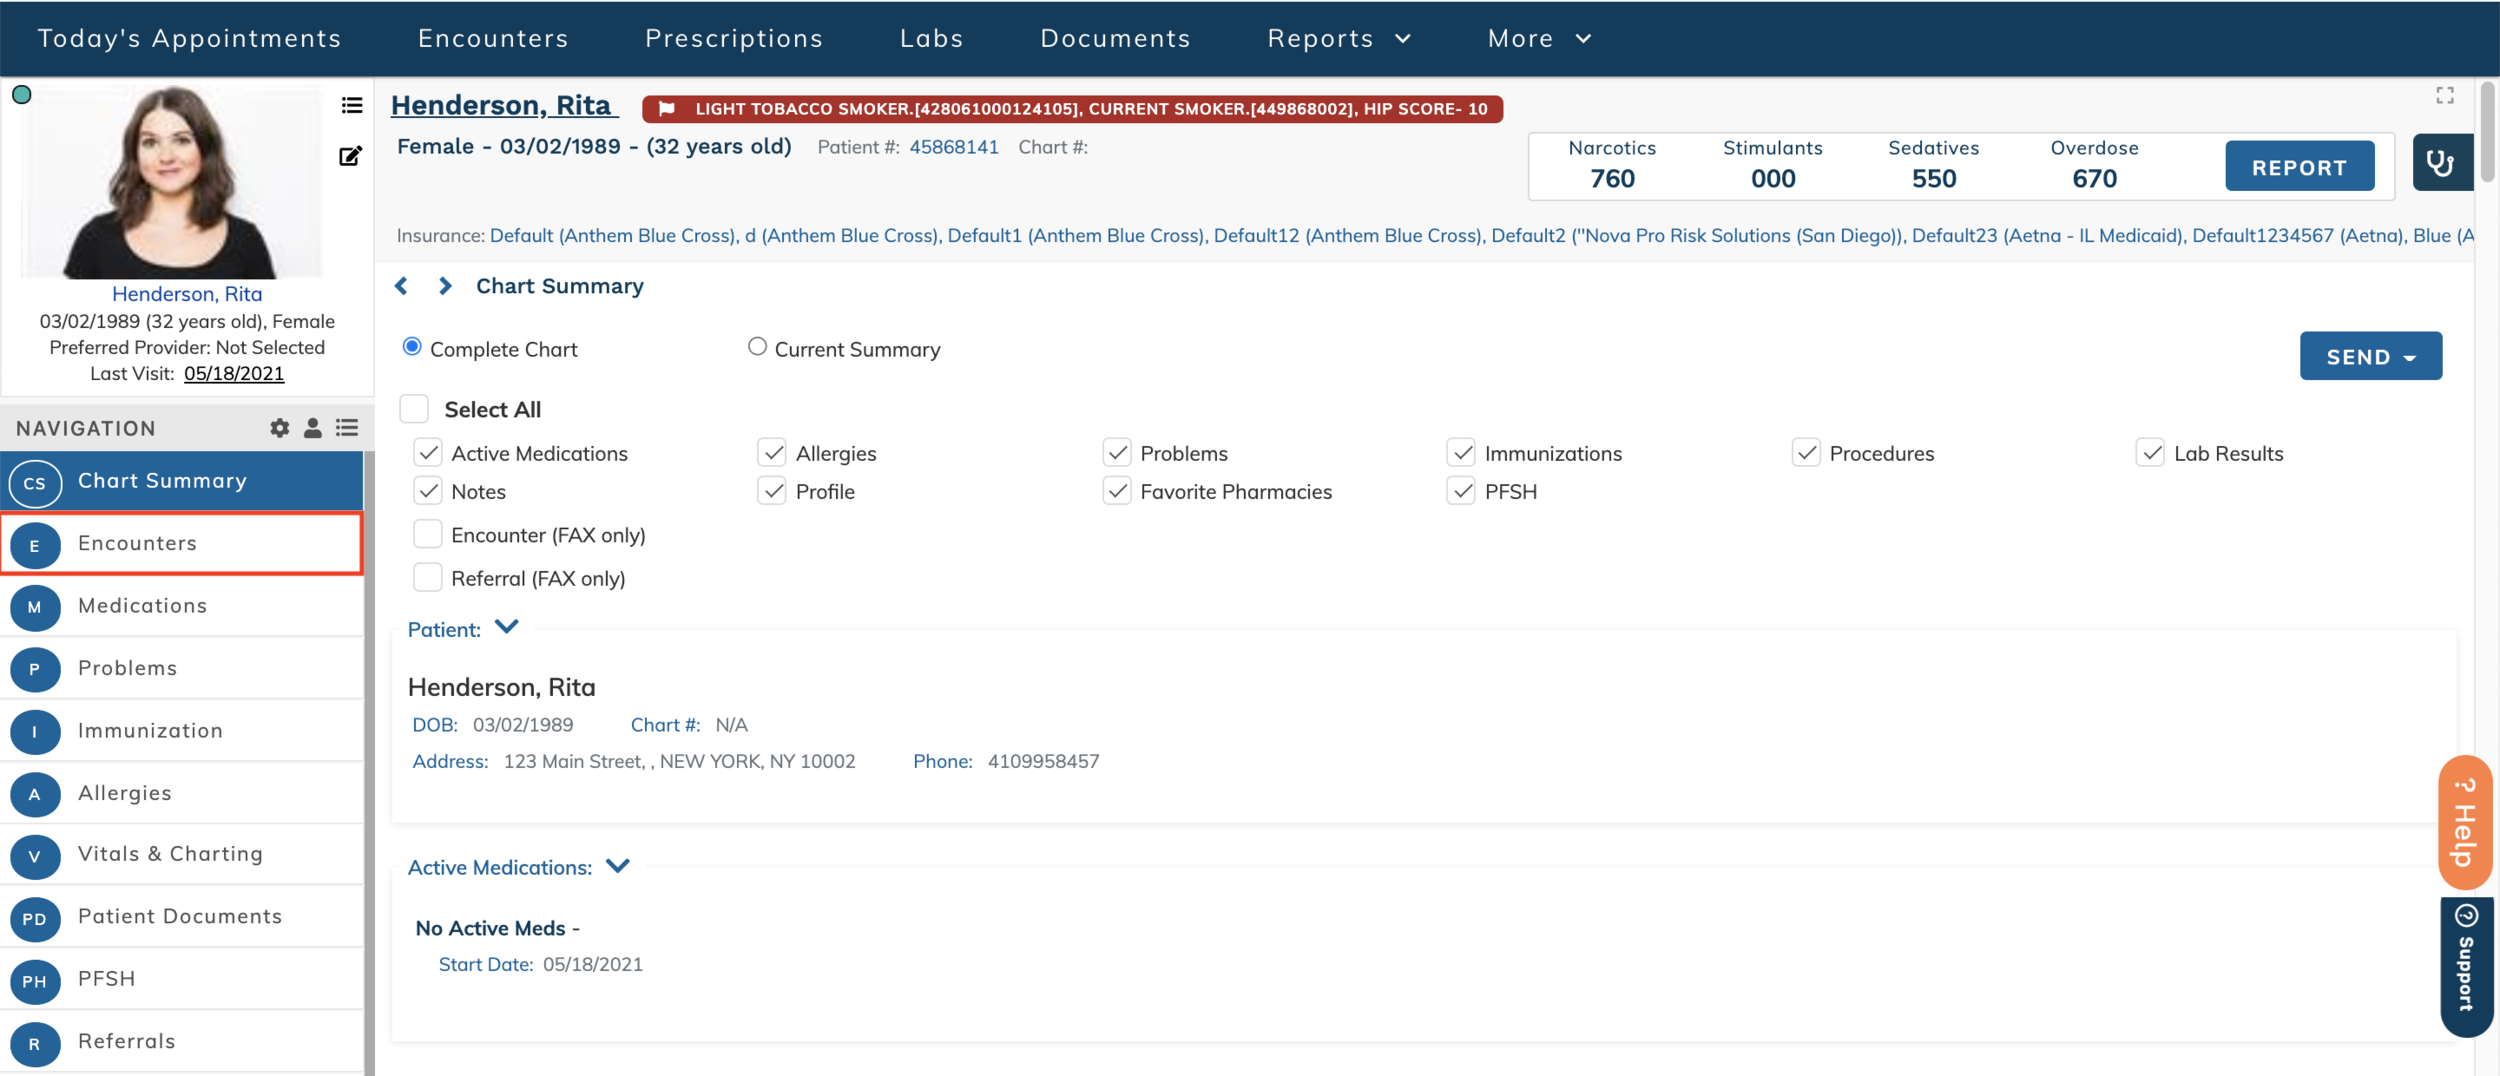
Search for and navigate to the appropriate patient. Click Encounters or (E) on the left side navigation.
Click the three dots icon to the right of the patient encounter that should be copied for the new encounter.

Select Release from the action menu. Click Release to confirm that you want to release the encounter. Select "Don't show this message again to hide this confirmation when releasing encounters.
If you are releasing an encounter that has more than 12 diagnosis codes, you'll be prompted to choose which diagnosis codes should go to the Billing product. Insurance claims are limited to 12 diagnosis codes or fewer.
Diagnosis codes linked to a procedure are automatically selected for release. Click the checkbox next to additional diagnosis codes that should be released.
Click Release to send the encounter to the Billing product.