edgeMED Help Center > Practice Management > Billing
Claim scrubbing.
Select a topic below or scroll through the page for the all content.
edgeMED’s claim scrubbing feature saves you time and helps get you reimbursed faster. Beginning immediately, you can quickly set up claims and see all edits at one time. Primary, secondary, or tertiary claims move automatically to our claim scrubbing queue for additional validation before they are sent to the clearinghouse and payer. You’ll see the real-time status of your claim and get explicit information about edits and how to correct them.
Single Claim
Primary Claim
Click on Send Claim/Save Claim on the encounter screen.
The system will move the encounter to the Claim Scrubbing (In Progress) tab to perform claim scrubbing. A message saying Scrubbing claim is displayed in the message column, indicating that the claim scrubbing is in progress.
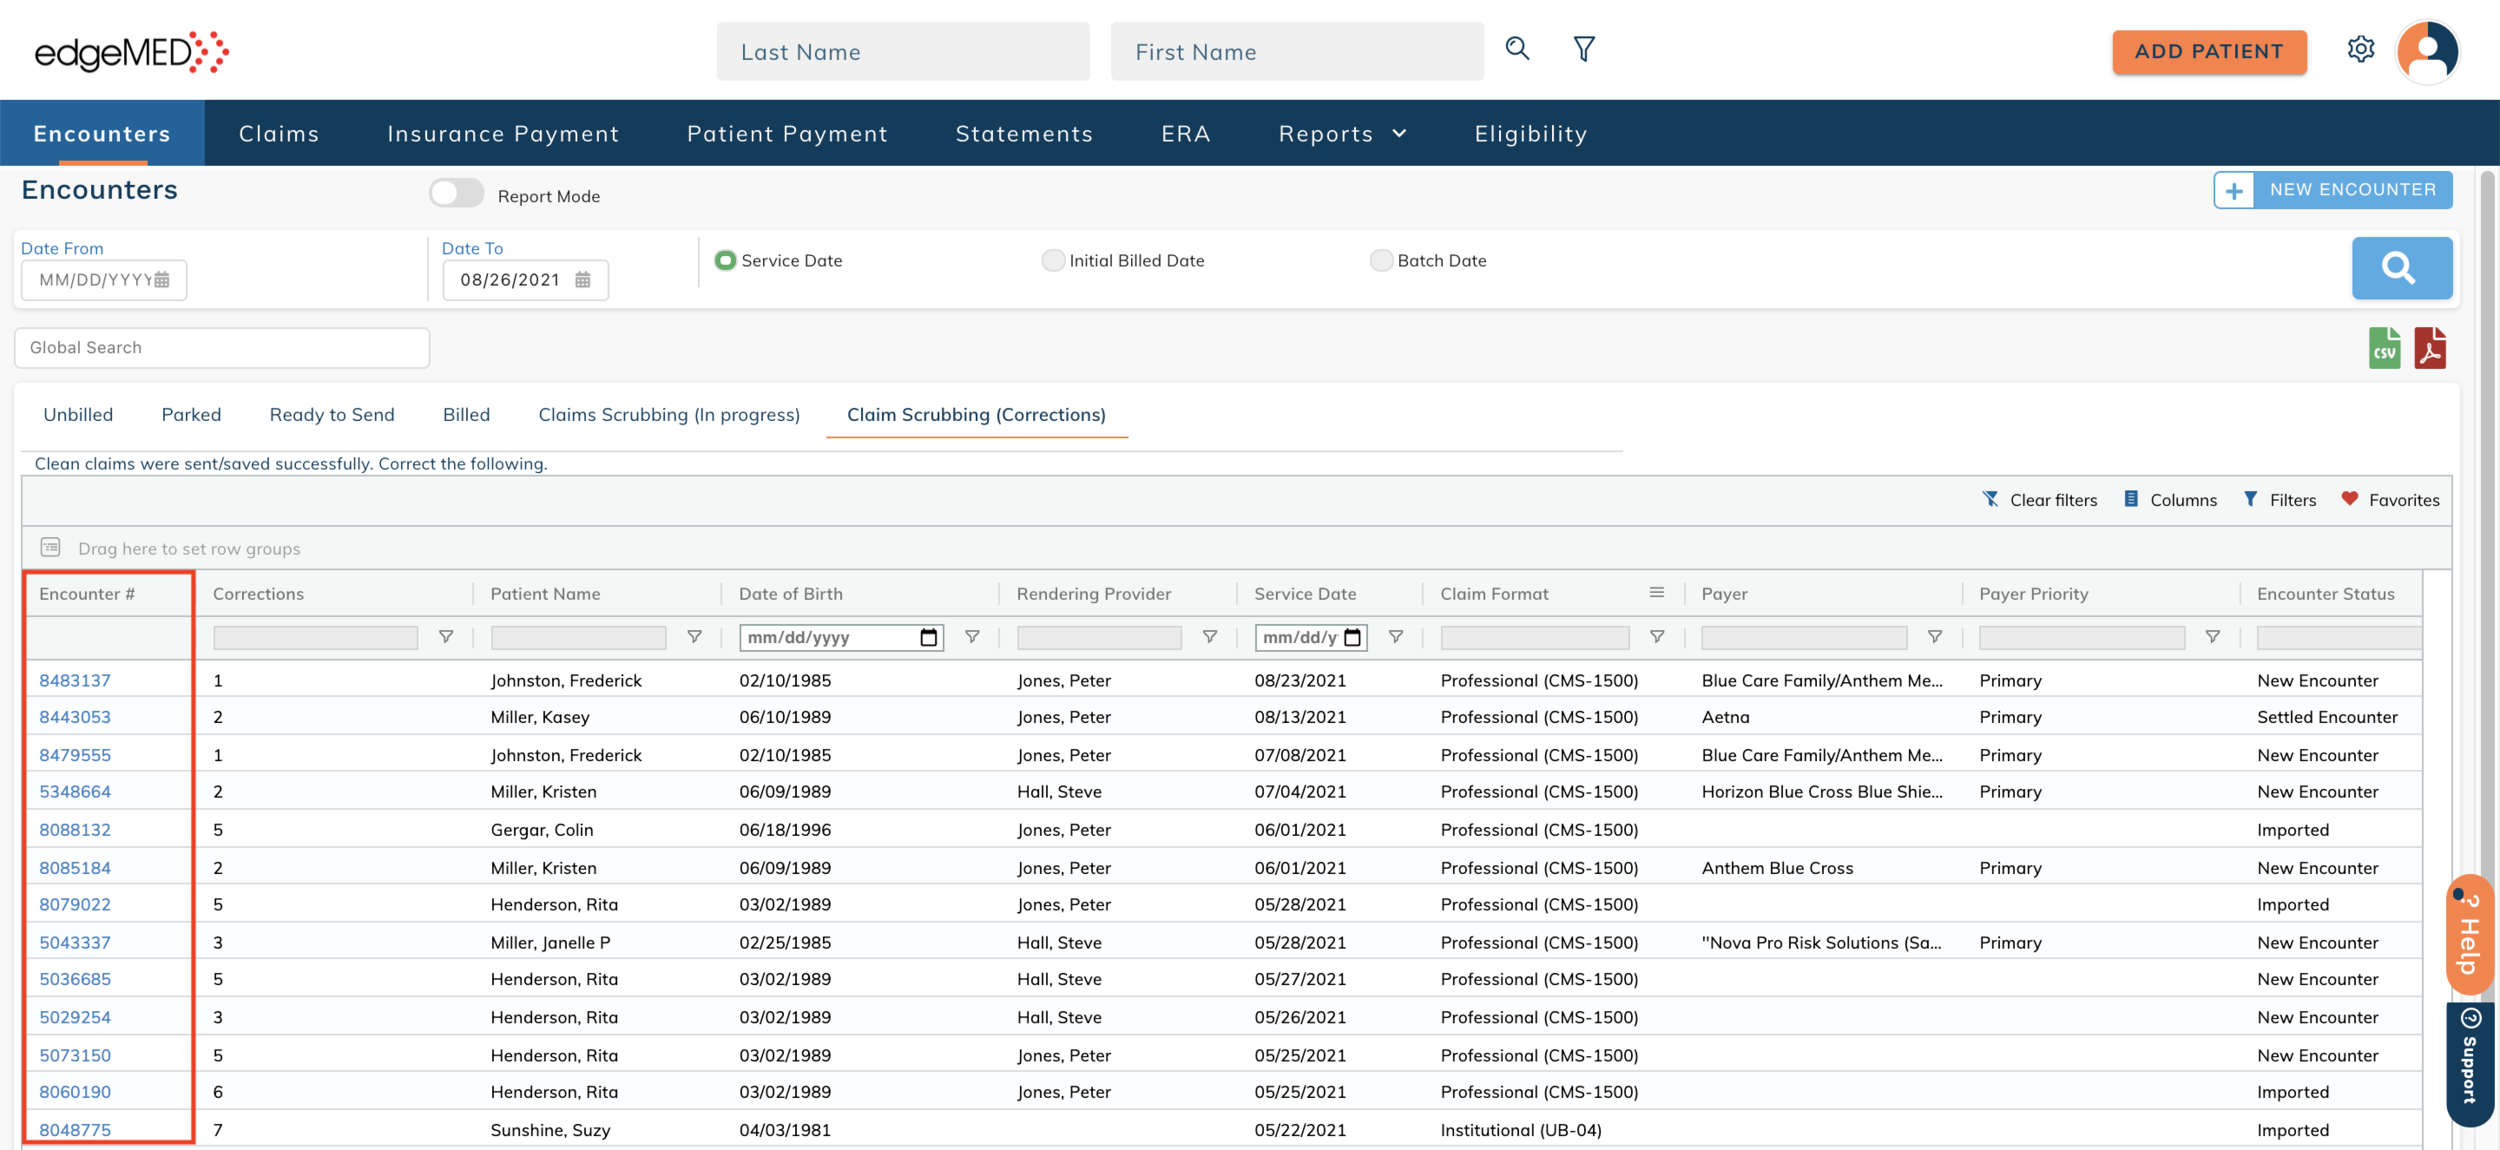
The Corrections column displays the number of edits that are required for each encounter. Hover over the number to find associated corrections in a tooltip.
Click on the Encounter Number.
The encounter displays each required claim edit. Make the claim edits and click the Save button at the top right to save the changes. The encounter moves to the Claim Scrubbing (In Progress) tab and the process is repeated.
Secondary/Tertiary Claims
Automatically generated or manually generated secondary/tertiary claims go through our claim-scrubbing queue for additional validations before going to the clearinghouse and payer.
Access an insurance payment from the I-Payment tab.
Make sure the Re-queue box is checked for the patient to automatically generate secondary/tertiary claims.
Select the encounter for which a secondary/tertiary claim should be created. Next, click on Save and Post.
The associated encounter will go to the Claim Scrubbing (In Progress) tab to get converted to a secondary or tertiary claim. As soon as the claim scrubbing is complete and no claim edits are required, the claim is sent successfully. If claim edits are required, the encounter will move to the Claim Scrubbing (Corrections) tab.
The Payer Priority column indicates if the payer is primary/secondary/tertiary.
Click on the encounter number in the Claim Scrubbing (Corrections) tab.
The encounter displays each required claim edit. Make the edits and click on Save.
The claim edits will be displayed on the encounter until you hit the Send claim or Save claim button. The encounter moves to the Claim Scrubbing (In Progress) tab and the process is repeated.
Bulk Claims
Select 1 or more encounters in the Unbilled tab.
Click on Send/Save claim button. The system will move the encounters to the Claim Scrubbing (In Progress) tab to perform claim scrubbing. The encounter cannot be accessed from the Claim Scrubbing (In Progress) tab.
As soon as the claim scrubbing is complete, the claim is sent/saved successfully if no claim edits are required. If claim edits are required, the encounter will move to the Claim Scrubbing (Corrections) tab.
The Corrections column displays the number of edits that are required for each encounter.
Click on the encounter number in the Claim Scrubbing (Corrections) tab.
The encounter displays each required claim edit. Click on the Save button to save the changes.
Click on Send claim or Save claim. The encounter moves to the Claim Scrubbing (In Progress) tab and the process is repeated.
Helpful Tips
Encounters with the status "Claim Scrubbing (In Progress)" cannot be edited.
To optimize workflow, clicking Send claim or Save claim will navigate you to the Encounters screen where charges can be easily added.
Clicking Send claim or Save claim from any screen will launch the new claim scrubbing process.
Receiving this error: "Claim scrubbing was not completed for this encounter. Send or save claim again."? This means a system error occurred during the claim scrubbing process. Click Send or Save Claim again.
If the case is changed to Self Pay for any encounter in the Claim Scrubbing (Corrections) tab, the associated encounter will automatically move to the Billed tab and claim validation messages will be cleared.


