

edgeMED Help Center > Practice Management > Scheduler
Accept credit card payments in Scheduler.
Select a topic below or scroll through the page for all content.
Save time by quickly processing credit card payments to the patient's balance, patient fund, and co-pay amount in Scheduler when patients are over the phone or in the office.
Credit Card Payments to the Patient Balance in Scheduler
You may use either the “Accept Payment Option” or the “Appointment Payment Tab.” Scroll down to view both options.
Use Accept Payment Option

Click Accept Payment.

Search for the patient.

Select Credit Card from the Payment Method from the drop-down.

Select the Patient Balance radio button.

Enter the credit card details.

Enter an amount equal to or lesser than the encounter balance amount for one or more encounters. The total payment amount will be displayed in the Balance Amount field. When done, Click Accept button.

A payment confirmation appears. The payment will be added to the Applied tab within Billing.
Use Appointment Payment Tab

Open the patients' appointment.

Click on the Payment tab in the appointment screen.

Select Credit Card from the Payment Method from the drop-down.

Select the Patient Balance radio button.

Enter the credit card details.

Enter an amount equal to or lesser than the encounter balance amount for one or more encounters. The total payment amount will be displayed in the Balance Amount field. When done, click Accept.

A payment confirmation appears.
Credit Card Payments to the Patient Fund in Scheduler
You may use either the “Accept Payment Option” or the “Appointment Payment Tab.” Scroll down to view both options.
Use Accept Payment Option
Click the Accept Payment button.
Select Credit Card from the Payment Method drop-down.
Select the Patient Balance radio button.
Enter the credit card details.

The Balance Amount field is zero in this example as the patient doesn't have an encounter balance. The encounter balance will be displayed here based on the encounters selected and the payment amount entered for each encounter.

Enter an amount in the Other Amount field.

The Total Amount will be displayed. Click Accept.
A Payment confirmation pop-up appears. This amount will be directly added to the patient's fund.
Use Appointment Payment Tab
Open the patients' appointment.
Click on the Payment tab on the appointment screen.
Select Credit Card from the Payment Method drop-down.
Select the Patient Balance radio button.
Enter the credit card details.
The Balance Amount field is zero in this example as the patient doesn't have an encounter balance. The encounter balance will be displayed here based on the encounters selected and the payment amount entered for each encounter.
Enter an amount in the Other Amount field.
The Total Amount will be displayed. Click Accept.
A Payment confirmation pop-up appears. This amount will be directly added to the patient's fund.
Credit Card Payments to the Co-Pay in Scheduler
You may use either the “Accept Payment Option” or the “Appointment Payment Tab.” Scroll down to view both options.
Use Accept Payment Option
Click the Accept Payment button.
Select Credit Card from the Payment Method drop-down.

Select the Co-Pay button.

Enter the credit card details.
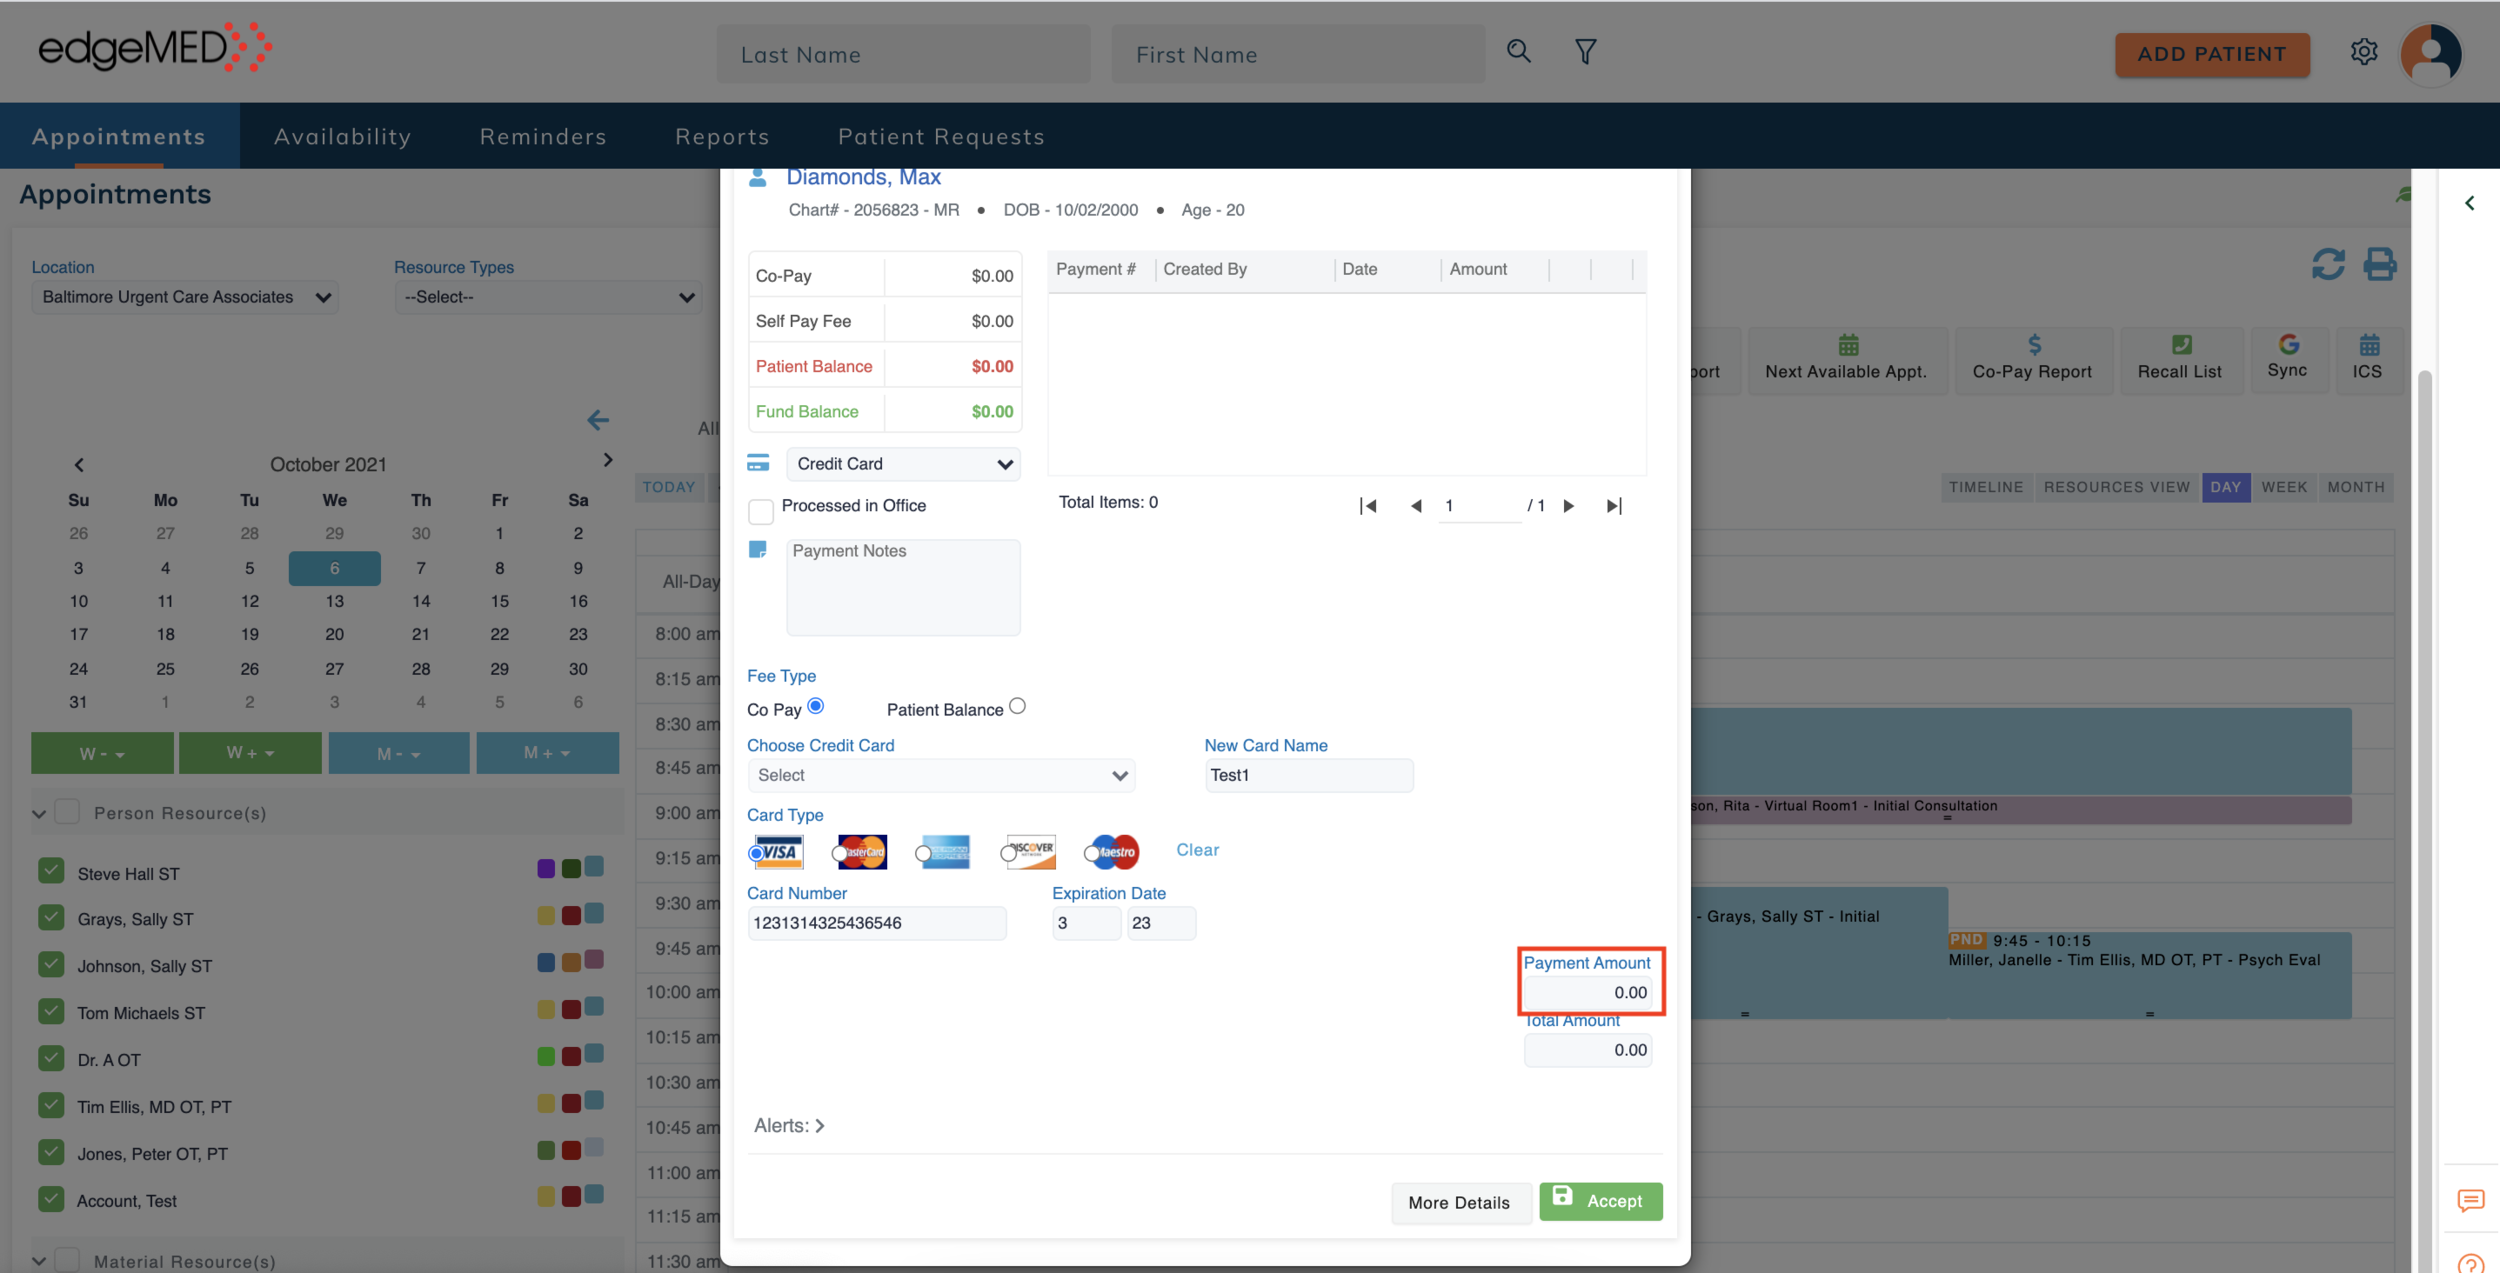
Enter an amount lesser or equal to the co-pay amount in the Payment Amount field. Click Accept.
A Payment confirmation pop-up appears. A patient payment will be added to the Unapplied tab in Billing.
Use Appointment Payment Tab
Open the patients' appointment.
Click on the Payment tab on the appointment screen.
Select Credit Card from the Payment Method drop-down.
Select the Co-Pay button.

Enter the credit card details.
Enter an amount lesser or equal to the co-pay amount in the Payment Amount field. Click Accept.
A Payment confirmation pop-up appears. A patient payment will be added to the Unapplied tab in Billing.
Track In-Office Credit Card Payments without Charging
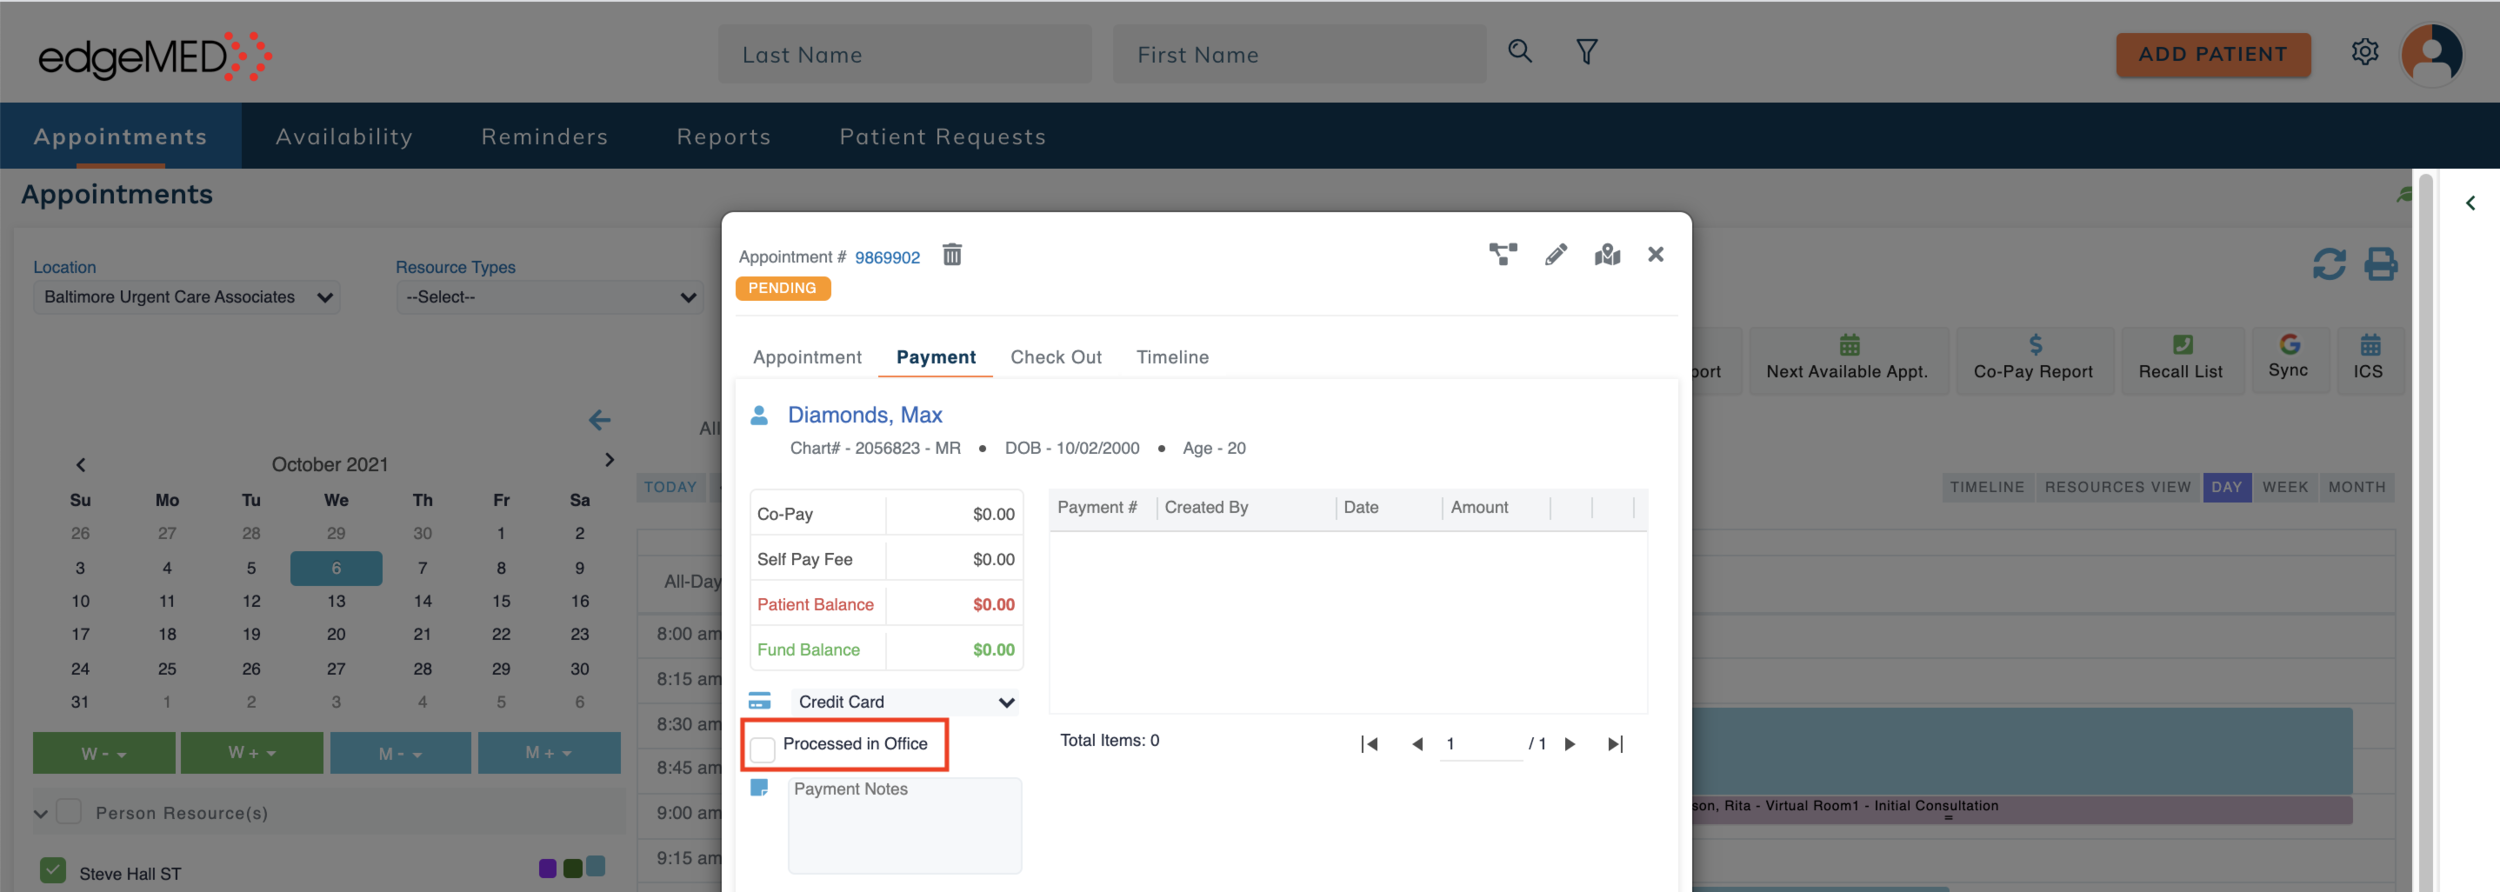
Scheduling Providers can track in-office credit card payments without charging the customer twice by selecting the Processed in Office checkbox.